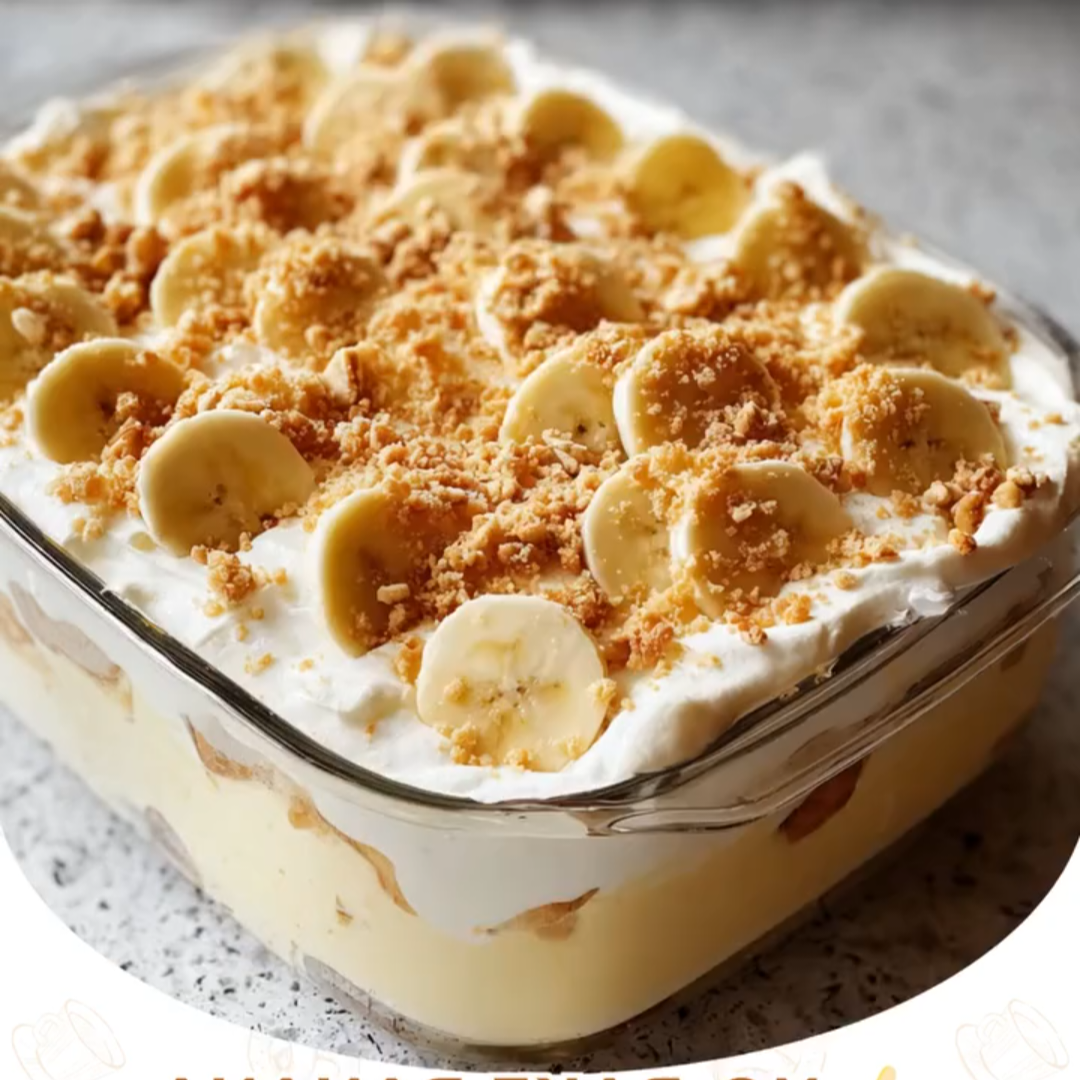
No-bake Banana Pudding Lush
Introduction
If you’re looking for an easy dessert that feels homemade, creamy, and completely irresistible, No-bake Banana Pudding Lush is a perfect choice. This chilled dessert combines layers of crunchy Nilla wafers, fresh bananas, creamy vanilla pudding, sweetened cream cheese, and fluffy whipped cream. The best part is that there is no oven required.
No-bake Banana Pudding Lush is ideal for family dinners, potlucks, holidays, birthdays, summer gatherings, or whenever you want a delicious dessert without spending hours in the kitchen. The preparation is simple, but the finished dessert looks beautiful when sliced and served cold.
The combination of flavors is what makes this dessert so special. The vanilla pudding provides a smooth and creamy base, while the cream cheese adds richness and a subtle tang. Fresh bananas bring natural sweetness, and the Nilla wafers soften in the refrigerator to create a tender, cake-like texture.
The ingredients are simple and easy to find, making this recipe convenient for both beginner and experienced home cooks. You can also customize the topping with mini marshmallows, chocolate shavings, or chocolate chips.
Why This Recipe Works
There are several reasons No-bake Banana Pudding Lush is such a dependable dessert.
First, the recipe uses instant vanilla pudding, which creates a thick and creamy filling without cooking. Once mixed with cold milk, the pudding quickly develops the consistency needed for layering.
The cream cheese mixture adds another level of richness. Softened cream cheese is beaten with granulated sugar until completely smooth. When combined with the pudding, it creates a creamy filling that is much more indulgent than ordinary pudding.
Homemade whipped cream keeps the dessert light. Heavy whipping cream is beaten with powdered sugar and vanilla until stiff peaks form. Folding it gently into the pudding mixture gives the filling a soft, airy texture.
The Nilla wafers are equally important. As the dessert chills, they absorb some of the moisture from the creamy layers and become soft without completely falling apart. This creates a texture similar to a traditional banana pudding while giving the dessert a more layered, lush consistency.
Finally, the bananas add freshness and natural sweetness. Their fruity flavor balances the richness of the cream cheese and whipped cream.
What You’ll Need For This Recipe
The ingredients for No-bake Banana Pudding Lush are straightforward and require very little preparation.
Ingredients
1 box (5.1 oz) instant vanilla pudding mix
2 cups cold milk
1 cup heavy whipping cream
1/4 cup powdered sugar
1 teaspoon vanilla extract
1 package (about 8 oz) cream cheese, softened
1/2 cup granulated sugar
1 package (12 oz) Nilla wafer cookies
3 ripe bananas, sliced
1/2 cup mini marshmallows, optional
1/4 cup chocolate shavings or chocolate chips, optional
Choosing the Best Ingredients
For the best results, use cold milk when preparing the instant pudding. Cold milk helps the pudding thicken properly.
Make sure the cream cheese is softened before mixing. Room-temperature cream cheese blends much more easily with sugar and helps prevent lumps.
Choose ripe but firm bananas. They should have plenty of flavor but still hold their shape when sliced. Extremely soft bananas can become mushy during assembly.
Fresh heavy whipping cream will give you the best homemade whipped cream. Keep it cold until you are ready to whip it.
For the cookies, classic Nilla wafers are ideal because they soften beautifully as the dessert chills.
How To Make No-bake Banana Pudding Lush
Step 1: Prepare the Vanilla Pudding
Start by adding the instant vanilla pudding mix and cold milk to a medium bowl.
Whisk the mixture thoroughly until smooth and thickened. Make sure there are no dry pockets of pudding mix remaining.
Set the pudding aside while you prepare the other components. Allowing it a few minutes to firm up makes the final filling easier to combine.
Step 2: Make the Whipped Cream
Pour the heavy whipping cream into a large mixing bowl.
Add the powdered sugar and vanilla extract. Using an electric mixer, beat the mixture until stiff peaks form.
Be careful not to overbeat the cream. Once it becomes thick and holds its shape, stop mixing.
Set the whipped cream aside.
Step 3: Prepare the Cream Cheese Mixture
Place the softened cream cheese into another mixing bowl.
Add the granulated sugar and beat until the mixture becomes smooth and creamy.
Take your time during this step because completely softened cream cheese will produce a much smoother filling.
Step 4: Combine the Pudding and Cream Cheese
Add the prepared vanilla pudding to the cream cheese mixture.
Beat or stir gently until the two mixtures are fully combined and smooth.
You should now have a thick, creamy vanilla mixture.
Step 5: Fold in the Whipped Cream
Add the prepared whipped cream to the pudding and cream cheese mixture.
Using a spatula, gently fold everything together.
Avoid aggressive stirring because you want to preserve the airy texture of the whipped cream. Continue folding until the mixture is evenly combined.
Step 6: Start Layering
Grab a 9×13-inch baking dish.
Arrange a layer of Nilla wafer cookies across the bottom. Break some cookies in half if necessary to fill empty spaces around the edges.
Next, arrange half of the sliced bananas over the cookies.
Spread half of the creamy pudding mixture over the bananas. Use a spatula to gently spread it into an even layer.
Step 7: Repeat the Layers
Add another layer of Nilla wafer cookies over the pudding mixture.
Follow with the remaining banana slices.
Finally, spread the rest of the pudding mixture evenly over the top.
Smooth the surface with a spatula so the dessert has a neat, finished appearance.
Step 8: Add the Toppings
For an extra-special finish, sprinkle mini marshmallows over the top.
You can also add chocolate shavings or chocolate chips. These toppings are optional, but they add extra texture and a little chocolate flavor.
Step 9: Chill
Cover the baking dish tightly with plastic wrap.
Refrigerate for at least 4 hours. For the best texture and flavor, let No-bake Banana Pudding Lush chill overnight.
This resting time allows the cookies to soften, the layers to firm up, and the flavors to blend together.
Step 10: Serve
Once completely chilled, remove the dessert from the refrigerator.
Scoop or slice it into portions and serve cold.
For the cleanest presentation, use a sharp serving knife or spatula and make sure each portion includes several layers.
Tips + Tricks & More For Recipe Success
For the best No-bake Banana Pudding Lush, keep a few simple tips in mind.
Use cold milk. Instant pudding thickens properly when prepared with cold milk, so avoid using warm or room-temperature milk.
Soften the cream cheese. Take it out of the refrigerator ahead of time. Soft cream cheese blends much more smoothly with sugar.
Don’t overbeat the whipped cream. Stop once stiff peaks form. Overbeating can change the texture and make the whipped cream less smooth.
Fold gently. When combining the whipped cream with the pudding mixture, use a spatula and gentle movements. This helps maintain the fluffy texture.
Choose firm-ripe bananas. Bananas that are ripe but still firm are easier to slice and layer.
Don’t rush the chilling time. The refrigerator is an important part of this recipe. The dessert needs several hours to properly set.
Overnight chilling is ideal. If you have enough time, prepare the dessert the day before serving. The wafers become wonderfully tender and the flavors have more time to develop.
Cover the dessert well. Plastic wrap helps prevent the dessert from absorbing odors from other foods in your refrigerator.
Slice bananas just before assembling. This minimizes the time they are exposed to air and helps them maintain their fresh appearance.
Don’t add too many toppings. Mini marshmallows and chocolate are delicious additions, but keeping the topping simple allows the banana and vanilla flavors to remain the stars.
How To Serve
No-bake Banana Pudding Lush is best served chilled directly from the refrigerator.
Use a large spoon or serving spatula to lift each portion from the baking dish. Try to scoop all the way down so each serving includes cookies, bananas, and creamy filling.
For a prettier presentation, add a few extra banana slices and Nilla wafer cookies immediately before serving.
You can also sprinkle a small amount of chocolate shavings over individual portions. A little extra whipped cream on top makes each serving feel even more special.
Because this is a rich and creamy dessert, moderate portions are usually satisfying.
Serving Suggestions
There are many ways to serve No-bake Banana Pudding Lush depending on the occasion.
For a family dinner, serve it after a simple homemade meal with coffee, tea, or cold milk.
For a summer gathering, keep the dessert refrigerated until you’re ready to serve. The cool, creamy texture makes it especially enjoyable on warm days.
For a holiday table, decorate the top with extra Nilla wafers and a few chocolate shavings for an elegant finish.
If you’re preparing it for a potluck, keep it covered and chilled until serving time.
You can also make individual portions by layering the cookies, bananas, and pudding mixture into small dessert cups. This creates a beautiful presentation and makes serving easier at parties.
Can You Make It Ahead?
Absolutely. In fact, making No-bake Banana Pudding Lush ahead of time is recommended.
Preparing it the night before gives the dessert plenty of time to chill and allows the Nilla wafers to soften naturally.
If you’re making it ahead, cover the entire dish tightly with plastic wrap and keep it refrigerated.
For the freshest appearance, you can add decorative toppings shortly before serving.
Storage
Store leftover dessert covered in the refrigerator.
Because this recipe contains dairy and fresh bananas, it should remain refrigerated rather than being left at room temperature for an extended period.
For the best texture and appearance, enjoy the leftovers within a few days.
The cookies will continue to soften as the dessert sits, so the texture will gradually become more tender.
Can You Customize This Recipe?
Yes. One of the advantages of No-bake Banana Pudding Lush is that it can easily be customized.
If you love chocolate and banana together, add extra chocolate shavings or chocolate chips to the topping.
For a more traditional banana pudding flavor, keep the topping simple with additional Nilla wafers and banana slices.
You could also add a light layer of crushed cookies on top for extra texture.
Mini marshmallows are another fun addition, especially if you’re making the dessert for children or a casual family gathering.
Just remember that optional toppings can change the overall sweetness, so adjust them according to your preference.
Prep Time, Chill Time & Total Time
Prep Time: 25 minutes
Chill Time: At least 4 hours
Recommended Chill Time: Overnight
Total Active Time: Approximately 25 minutes
Total Time: About 4 hours 25 minutes or overnight
Servings: Approximately 12 servings
Final Thoughts
With its creamy vanilla filling, fresh bananas, tender cookies, and fluffy whipped cream, No-bake Banana Pudding Lush is the kind of dessert that feels both nostalgic and indulgent.
It brings together the comforting flavors of classic banana pudding while adding a richer cream cheese layer and homemade whipped cream. The fact that it requires no baking makes it even more convenient.
Whether you’re making dessert for your family, preparing something for a party, or simply craving something sweet, this recipe is easy enough for a beginner and impressive enough for guests.
The key is giving the finished dessert enough time in the refrigerator. Once those layers have had time to chill and blend together, every spoonful delivers creamy pudding, sweet banana, soft vanilla wafers, and a light whipped texture.
Prepare it ahead, keep it chilled, add your favorite toppings, and enjoy a dessert that’s simple to make and hard to resist.
No-bake Banana Pudding Lush is proof that you don’t need an oven or complicated techniques to create a memorable homemade dessert.