Homemade Banana Pudding: A Creamy, Nostalgic Delight
There’s something magical about Homemade Banana Pudding. This dessert has graced countless family tables and continues to evoke feelings of comfort and nostalgia. With layers of silky vanilla pudding, ripe bananas, and crunchy vanilla wafers, it’s a dessert that brings smiles and sweet memories with every bite. Perfect for weekend gatherings, potlucks, holidays, or even as a special treat for yourself, this classic Southern dessert is both effortless to prepare and incredibly rewarding.
In this article, you’ll find a comprehensive guide that covers everything: a rich introduction, why the recipe works so well, ingredient breakdowns, step-by-step instructions, expert tips, serving suggestions, timing, and more. By the end, you’ll be ready to make a banana pudding that will impress anyone lucky enough to try it.
1. Introduction to This Creamy Classic Dessert
Banana pudding isn’t just a dessert—it’s a memory. Even if you didn’t grow up with it, the combination of textures and flavors creates a warm, nostalgic feeling. The silky pudding, fresh banana slices, airy whipped topping, and softening vanilla wafers combine into a dessert that feels like a comforting hug in every spoonful.
This recipe is particularly wonderful because it doesn’t require cooking. Using instant pudding, it’s quick, easy, and foolproof while still tasting luxurious. Sweetened condensed milk adds richness, and the whipped topping keeps the layers light and fluffy. Whether you choose to assemble it in a large dish or elegant individual servings, this banana pudding is versatile, crowd-pleasing, and guaranteed to impress.
2. Why This Recipe Works So Well
Banana pudding can sometimes turn out watery, overly sweet, or mushy if not executed properly. This recipe, however, hits all the right notes:
Instant pudding ensures perfect texture. It thickens quickly and sets beautifully in the fridge.
Sweetened condensed milk adds decadent richness. It’s deeper and sweeter than milk-only versions.
Whipped topping keeps it airy. The pudding mixture transforms into a light, mousse-like consistency.
Ripe bananas provide natural sweetness and freshness. They complement the creamy layers perfectly.
Vanilla wafers add structure and texture. They soften just enough to create a cake-like bite without becoming soggy.
Layering creates balance. Every spoonful delivers pudding, banana, and wafer in perfect harmony.
Chilling transforms the dessert. Refrigeration allows flavors to meld and wafers to soften, producing the ideal creamy, tender consistency.
This combination of ingredients and technique ensures the dessert works every single time.
3. What You’ll Need for This Recipe
This dessert requires simple, accessible ingredients that are easy to find in any grocery store.
Dry Ingredients:
1 box (5 oz) instant vanilla pudding mix
1 box (11 oz) vanilla wafers
Wet Ingredients:
3 cups cold milk
1 can (14 oz) sweetened condensed milk
1 container (8 oz) whipped topping, thawed
Fresh Ingredients:
5–6 ripe bananas, sliced
Equipment:
Large mixing bowl
Whisk
Spatula
9×13-inch pan or trifle bowl
Knife and cutting board
Measuring cups
No stove, baking, or cooking is required—just simple assembly.
4. Step-by-Step Instructions for Homemade Banana Pudding
To ensure your banana pudding comes out perfectly, follow these steps carefully.
Step 1 — Prepare the Pudding Base
In a large mixing bowl, whisk together the instant vanilla pudding mix and cold milk until smooth and slightly thickened (about 1–2 minutes).
Stir in the sweetened condensed milk until fully incorporated.
Gently fold in the whipped topping using a spatula.
The final pudding mixture should be light, creamy, and fluffy—ready for layering.
Step 2 — Assemble the First Layer
Spread a thin layer of pudding across the bottom of your dish.
Place a single layer of vanilla wafers on top of the pudding.
Add a layer of sliced bananas evenly over the wafers.
Top with a thick layer of pudding, spreading evenly.
This first layer acts as a foundation for the remaining layers, keeping everything in place.
Step 3 — Continue Layering the Dessert
Repeat the layers in the following order: wafers → bananas → pudding.
Build as many layers as your dish allows.
Finish with a thick final layer of pudding to seal all the layers.
In a trifle dish, this layering creates a visually stunning effect, perfect for entertaining.
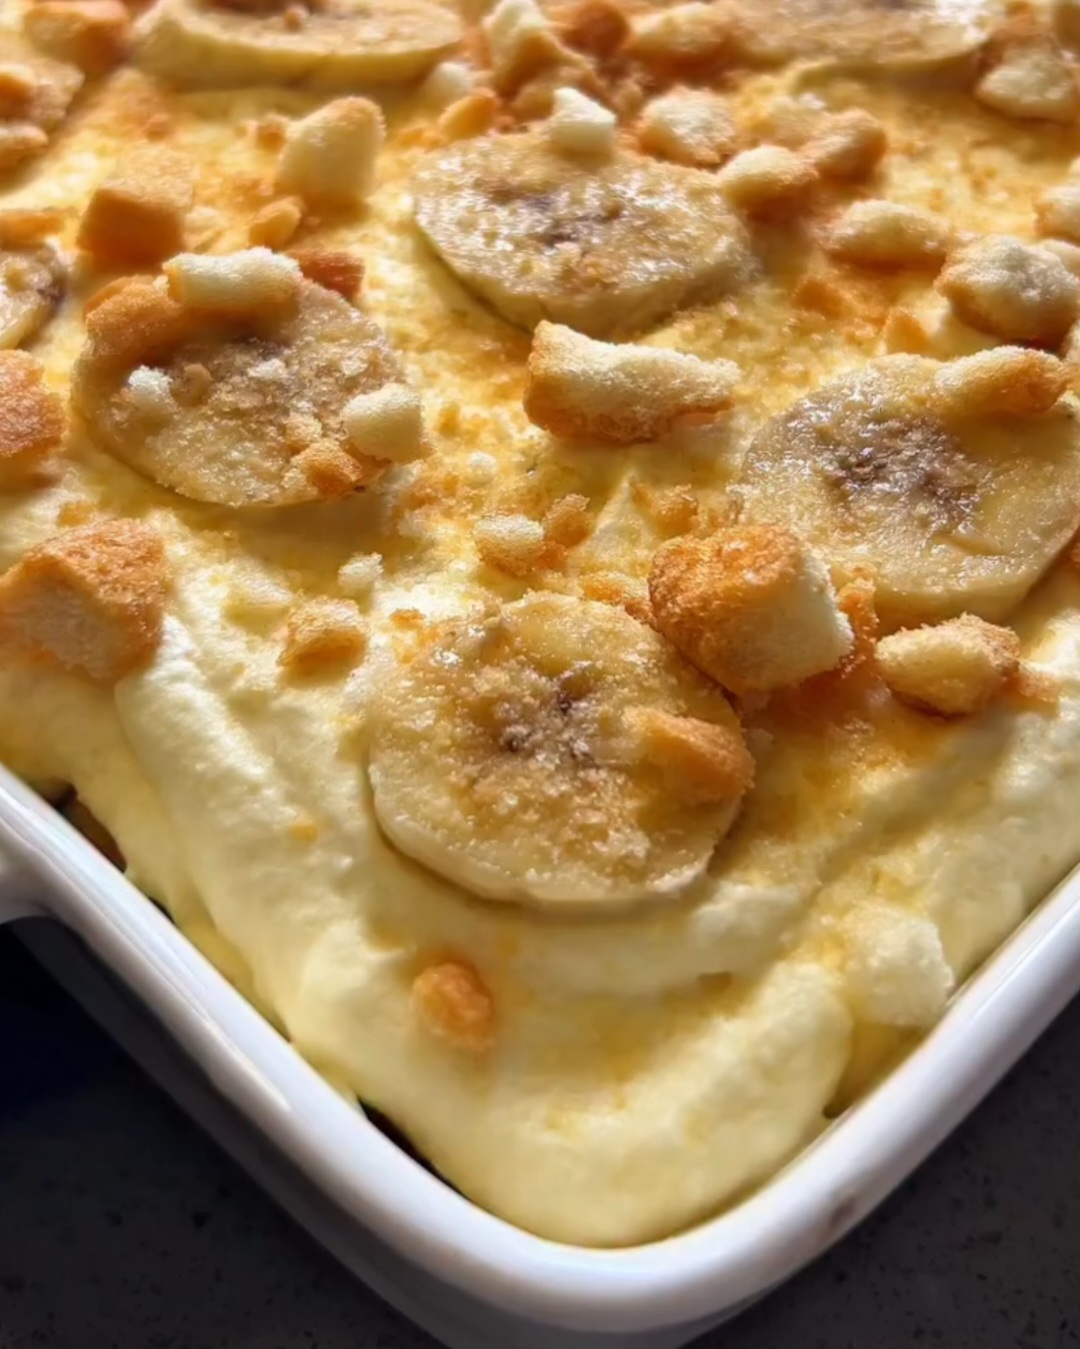
Step 4 — Topping and Decoration
The final layer is your opportunity to make your dessert look beautiful:
Add whole or crushed vanilla wafers.
Arrange a few banana slices on top (add these just before serving to prevent browning).
Optionally, sprinkle a pinch of cinnamon or drizzle caramel sauce.
This gives your pudding a professional, visually appealing finish.
Step 5 — Chill the Banana Pudding
Refrigerate your dessert for at least 4 hours to allow the pudding to set and wafers to soften.
Overnight chilling is ideal for maximum flavor and the perfect melt-in-your-mouth texture.
Serve cold for the best experience.
5. Tips + Tricks for Recipe Success
Use cold milk to help pudding set properly.
Slice bananas just before assembling to avoid discoloration.
Choose bananas that are ripe but firm for the best texture.
Add banana extract for an extra punch of banana flavor.
Reduce milk for thicker pudding if desired.
Layer evenly to ensure perfect bites every time.
Chill longer for softer wafers and a more cohesive dessert.
Use a trifle bowl for parties—layers will look elegant and inviting.
Add cream cheese for a richer, silkier pudding (optional).
Garnish last to keep bananas fresh and prevent browning.
6. How to Serve Homemade Banana Pudding
Banana pudding is best served cold straight from the refrigerator. Use a large spoon to scoop from the bottom, ensuring each portion has pudding, bananas, and wafers. For events, serve in a chilled dish on ice or consider individual cups for an elegant presentation.
7. Serving Suggestions
Trifle-style presentation: Layer in a tall glass dish to show off the layers beautifully.
Mini dessert cups: Ideal for parties and events.
Toppings: Drizzle caramel, sprinkle cinnamon, chocolate shavings, or crushed cookies.
As a pie filling: Pour into a graham cracker crust to make banana pudding pie.
Whipped cream swirls: Add piped whipped cream for an elegant touch.
Extra fruit: Pair with strawberries, blueberries, or toasted coconut for variety.
8. Recipe Timing & Prep Overview
Prep Time: 15 minutes
Assembly Time: 10 minutes
Chilling Time: 4 hours minimum (overnight preferred)
Total Time: Approximately 4 hours 25 minutes
This dessert is excellent for make-ahead occasions and can save time during busy holidays or parties.
9. Storage Tips
Refrigerator: Store in an airtight container for up to 3 days.
Avoid freezing: Bananas and whipped topping do not freeze well, as texture will change.
Cover tightly: This prevents absorption of other fridge odors and keeps the pudding fresh.
10. Variations to Try
Chocolate Banana Pudding: Add cocoa powder or chocolate pudding mix.
Tropical Twist: Layer with pineapple or mango chunks.
Nutty Crunch: Sprinkle chopped pecans or walnuts between layers.
Boozy Banana Pudding: Add a splash of rum or bourbon for adult gatherings.
Healthier Version: Use low-fat milk and whipped cream alternatives.
11. Common Mistakes to Avoid
Overripe bananas: Can turn mushy and watery.
Under-chilling: Layers won’t set and wafers remain crunchy.
Mixing pudding too vigorously: Can deflate whipped topping.
Layer imbalance: Some bites may have too much pudding and not enough bananas or wafers.
Topping too early: Bananas will brown if left exposed too long.
12. Why You’ll Love This Recipe
This recipe combines simplicity with indulgence. It requires no cooking, minimal prep, and only a handful of ingredients. Yet, the end result is creamy, luscious, and full of flavor. It’s perfect for all ages and occasions. Whether it’s a weeknight treat, holiday celebration, or casual family dinner, this banana pudding delivers nostalgia, comfort, and pure joy.
13. Fun Facts About Banana Pudding
Banana pudding originated in the Southern United States in the 19th century.
Vanilla wafers are the classic cookie choice because they soften just right.
This dessert is often served at potlucks and family gatherings because it’s easy to transport.
Some families add meringue instead of whipped topping for a traditional touch.
The layering method was popularized as a way to enhance flavor in every bite.
14. Conclusion: The Perfect Make-Ahead Dessert
Homemade Banana Pudding is the ultimate comfort dessert—simple, elegant, and irresistibly creamy. With layers of pudding, bananas, and vanilla wafers, it captures the essence of Southern nostalgia. Minimal prep and maximum flavor make it a reliable choice for parties, holidays, or everyday indulgence.
Chill it, serve it cold, and watch everyone savor each dreamy bite. Once you try this recipe, it will become a staple in your dessert repertoire—classic, timeless, and always delicious.